ComponentJS Tutorial  

Understand step-by-step how to leverage from ComponentJS

In this little tutorial we present you a trivial sample application in 7 incremental steps. The steps 1 and 2 are still bad code which you never should write, but which allows you to understand the functionality and result and let you approach our final structure. In step 3 we kick in the component system but are still incomplete from a functionality point of view. In step 4 we are functionality wise complete and in step 5 to 7 we use more and more features of the component system to even better structure our application. Each step contains the complete sources but the differences to the previous step are highlighted.

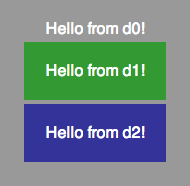
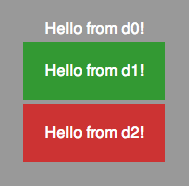
From a domain-specific point of view the sample consists of three optical components: an outer "panel" component d0, an inner "select" component d1 and an inner "detail" component d2. The dynamic behaviour is: clicking into d1 triggers a background color toggling in d2. This intentionally is just an ultra trivial functionality and optical presentation, because it should illustrate the underlying use of a component system only.

Notice: for this ultra trivial sample, the overhead (aka boilerplate code) the component system causes looks strange. The point is: this overhead exists, but it is exactly the same, independent whether it is an ultra trivial sample or a full-blown business information system with hundreds of complex dialogs. Without a component system, trivial things are trivial and complex things are impossible. With a component system, trivial things are actually out of focus while complex things can be finally mastered!
Attention: Without ComponentJS, easy things are easy and hard things are often impossible. With ComponentJS, easy things are less easy (because of the overhead every framework inherently causes) but hard things are now finally possible! Please keep this in mind and don't be confused if the trivial Step 1 becomes a "monster" in Step 7. Once you mastered this "overhead", it keeps the same — independent how large any application later becomes.

In Step 1 we create our trivial UI the "Rookie" way, i.e., still without any component system, without any separation of concerns and everything in just one file. You don't want to structure your UI this way in practice, of course. But it is a good initial step because it at least allows you to understand the entire tutorial functionality easily.
Run Application

Code Status:
BAD CODE

In Step 2 we initially structure our UI into multiple files and some initial function contexts, but still without any component system. You still don't want to structure your UI this way in practice, of course. But it is a reasonable intermediate step which allows us to understand how we approach our target structure.
Run Application

Code Status:
BETTER, BUT
STILL BAD CODE

In Step 3 we finally kick in the component system, but for didactic reasons we still leave out the dynamic behaviour on clicking d1 (we will add this in the following step). In this step Step 3 the previous functions became methods in classes and the classes are instanciated as UI components. Also notice that the embedding of d1 and d2 into d0 leverages a "socket" functionality which abstracts away the actual embedding: child components just "plug" into a socket, supplied by a parent component — without having to know who the parent component actually is and how the (UI toolkit dependent) embedding actually is done.
Run Application

Code Status:
GOOD CODE, BUT
STILL INCOMPLETE

In Step 4 we finally bring our example functionality-wise on par with Step 2 again by also adding the dynamic clicking behavior, but this time with the help of the component system and with strong Separation of Concerns. For this, d1 converts its DOM mouse click event into a component event "d1-clicked" only. This is then dispatched by the component system also on the parent component d0 which in turn tells d2 to toggle its color by calling a "toggle-color" service on it. Finally d2 had registered such a service and reacts accordingly.


Notice the following important facts: d1 does not know how to react on the mouse click, it just publishes it as an event; d0 receives the event as an abstracted event and has not to know that it actually was a DOM mouse click event; d0 is the only component which knows that on clicking d1 a color toggling in d2 has to occur, because it previously instanciated both sub-components; d2 finally only knows how to toggle its color, but has not to know when.

Run Application

Code Status:
GOOD CODE

In Step 5 we split both the d1 and d2 components into three distinct components: Model, View and Controller — Notice that component d0 not even has to recognize this splitting in components d1 and d2. This splitting works by using passive component system driven models on the model components which allow both the view and the controller components to actively observe them.
Run Application

Code Status:
GOOD CODE

In Step 6 we just add some debugging output to the model observers of components d1 and d2 to allow us to see what actually happens when we click onto d1. Then we add a new index.js which is like index.html but can be directly executed in batch by Node.js. And in app-boot.html we drive the UI just up to the "prepared" state instead of "visible" in case no DOM is available under runtime (as it is the case in Node.js, which is just the V8 JavaScript run-time but without any DOM at all). As an effect, we can now even drive the UI on the command-line via Node.js and it still executes.
Run Application

Code Status:
GOOD CODE

In Step 7 we recognize that the model and view components d1 and d2 are very similar. So, we refactor their model and view into a common dx model and view component and use them from the remaining d1 and d2 controller components. To make the reusability more obvious and interesting we even introduce a new d3 controller component which is similar to d2 but uses a different label and color.
Run Application

Code Status:
GOOD CODE